How to Make Clothing Mockup in Photoshop – A Step-By-Step Tutorial
Introduction
If you’re an e-commerce seller or a print-on-demand (POD) creator, you already know the importance of great visuals. A well-designed product mockup not only makes your clothing look professional but also helps customers imagine wearing it. The problem? Professional photoshoots are expensive and time-consuming. That’s why many sellers turn to Photoshop mockups to bring their designs to life.
In this tutorial, we’ll walk you through the step-by-step process of creating a clothing mockup in Photoshop, and then we’ll show you a smarter, faster alternative with Mockuplabs.
Photoshop mockup workflow: step-by-step
Creating a realistic clothing mockup in Photoshop is all about layers, blending, and attention to detail. Here’s the process broken down.
Step 1: Import a clothing template
Start by downloading a blank PSD clothing template, these templates usually have multiple layers for shadows, highlights, and the base garment.
Open the PSD file in Photoshop and take a few minutes to explore the layers. It helps to know which ones control the fabric, lighting, and background.
Step 2: Adjust garment base color
Before adding your design, adjust the base color of the clothing. Use Hue/Saturation or a Solid Color Adjustment Layer to change the T-shirt, hoodie, or bag color. This step is crucial if you want to offer multiple color variations without creating separate templates for each.
Step 3: Insert your design
Drag and drop your design (usually PNG with a transparent background or vector file) into the template. Position it roughly where it should sit on the garment. Make sure it fits naturally within the print area.
Step 4: Use warp for realism
Use the Warp Tool to adjust your design so it follows the contours of the garment. Subtle adjustments make your design appear printed rather than pasted. For more complex items like hoodies or AOP garments, experiment with the Puppet Warp Tool to manipulate curves more accurately.
Step 5: Convert layer to smart object (optional)
Converting your design layer to a Smart Object is optional but recommended, especially if you plan to reuse the mockup multiple times. This allows you to swap designs without redoing warp or blending adjustments. Simply double-click the Smart Object to replace the artwork while keeping all effects intact.
Step 6: Blend design with fabric
To make your design look realistic, change the layer blending mode. Multiply, Overlay, or Soft Light often work best, depending on the fabric texture and lighting. You may also lower the opacity slightly to allow the natural folds and shadows of the garment to show through.
Step 7: Use layer mask & soft brush for lighting
Add a layer mask to your design layer and use a soft, low-opacity brush to paint over areas where natural folds catch the light. This technique ensures your design interacts with the garment’s creases realistically.
Step 8: Preview and refine
Zoom out and examine your mockup. Check angles, edges, and color consistency. Adjust blending, shadows, and highlights until your design feels integrated with the garment.
Step 9: Export your mockup
Once satisfied, export your mockup as a high-resolution PNG or JPEG. This image can now be used for online listings, social media, marketing campaigns, or Etsy/Shopify product pages.
FAQs about making clothing mockup in Photoshop
Q1. Do I need advanced Photoshop skills?
Not necessarily. As long as you understand layers, masks, blending modes, and basic transformations, you can create realistic mockups. Practice helps, and using high-quality templates makes the process smoother.
Q2: Can I make all-over-print clothing mockups in Photoshop?
Yes, but it’s more complex. You’ll need templates that support AOP (all-over-print) designs, plus careful use of warp and perspective tools to match the garment’s folds.
Q3: Where can I find free clothing templates?
Websites like Freepik, GraphicBurger, and Creative Market offer free or affordable PSD mockups.
Q4: Is Photoshop the fastest way to make mockups?
Photoshop offers control and customization but can be slow for multiple products or new designs. For sellers who value faster time to market, AI-powered tools like Mockuplabs are game changers.
Meet Mockuplabs.ai – A smart alternative
Photoshop is powerful, but e-commerce sellers often need speed, variety, and simplicity. That’s where Mockuplabs comes in: a tool designed to help POD creators generate high-quality clothing mockups in seconds.
1. Generate mockups in just 3 steps
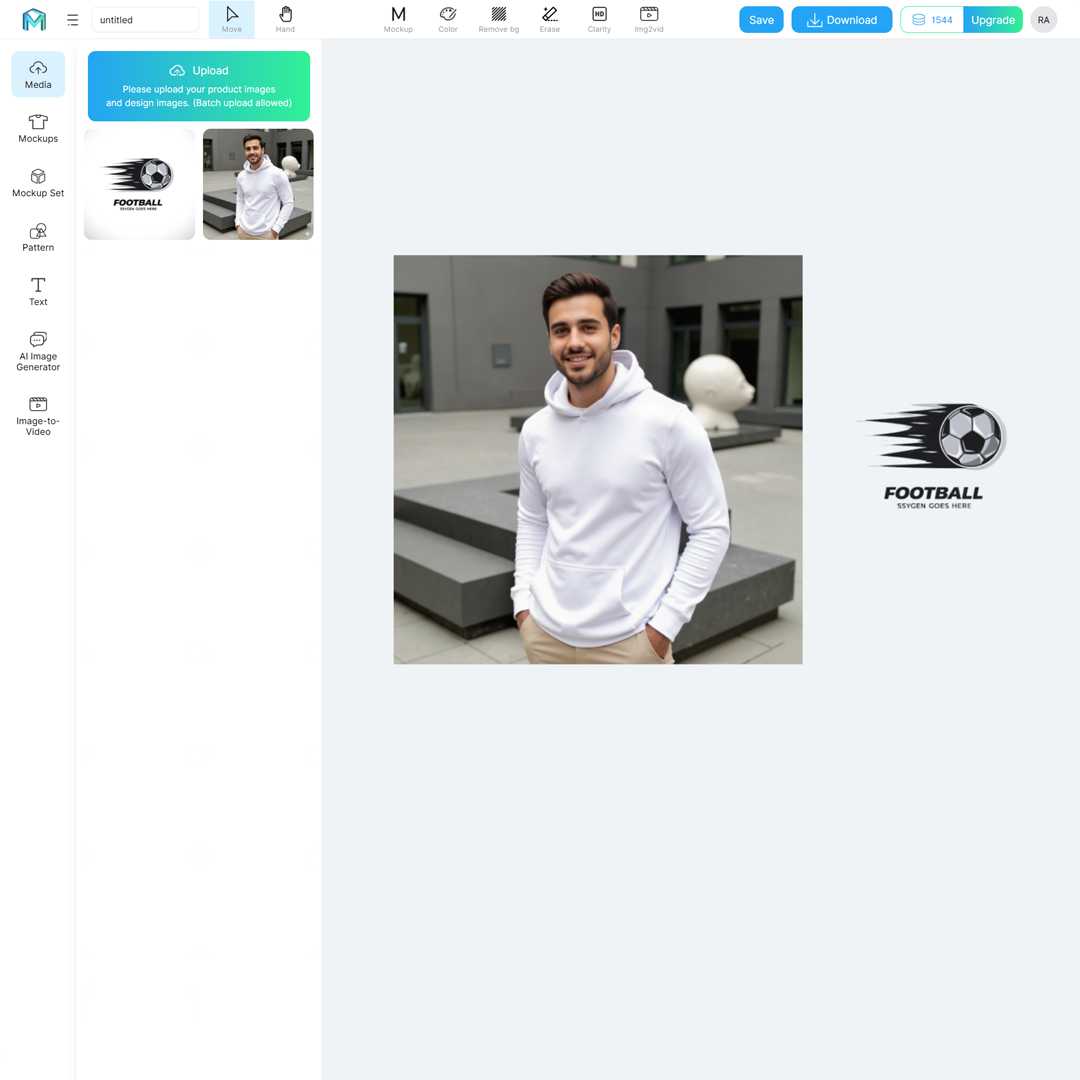
Upload your base product image, drag and drop your design, and export. That’s it. It’s perfect for sellers managing multiple products or color variations because there are no layers, no warping, and no complex adjustments.
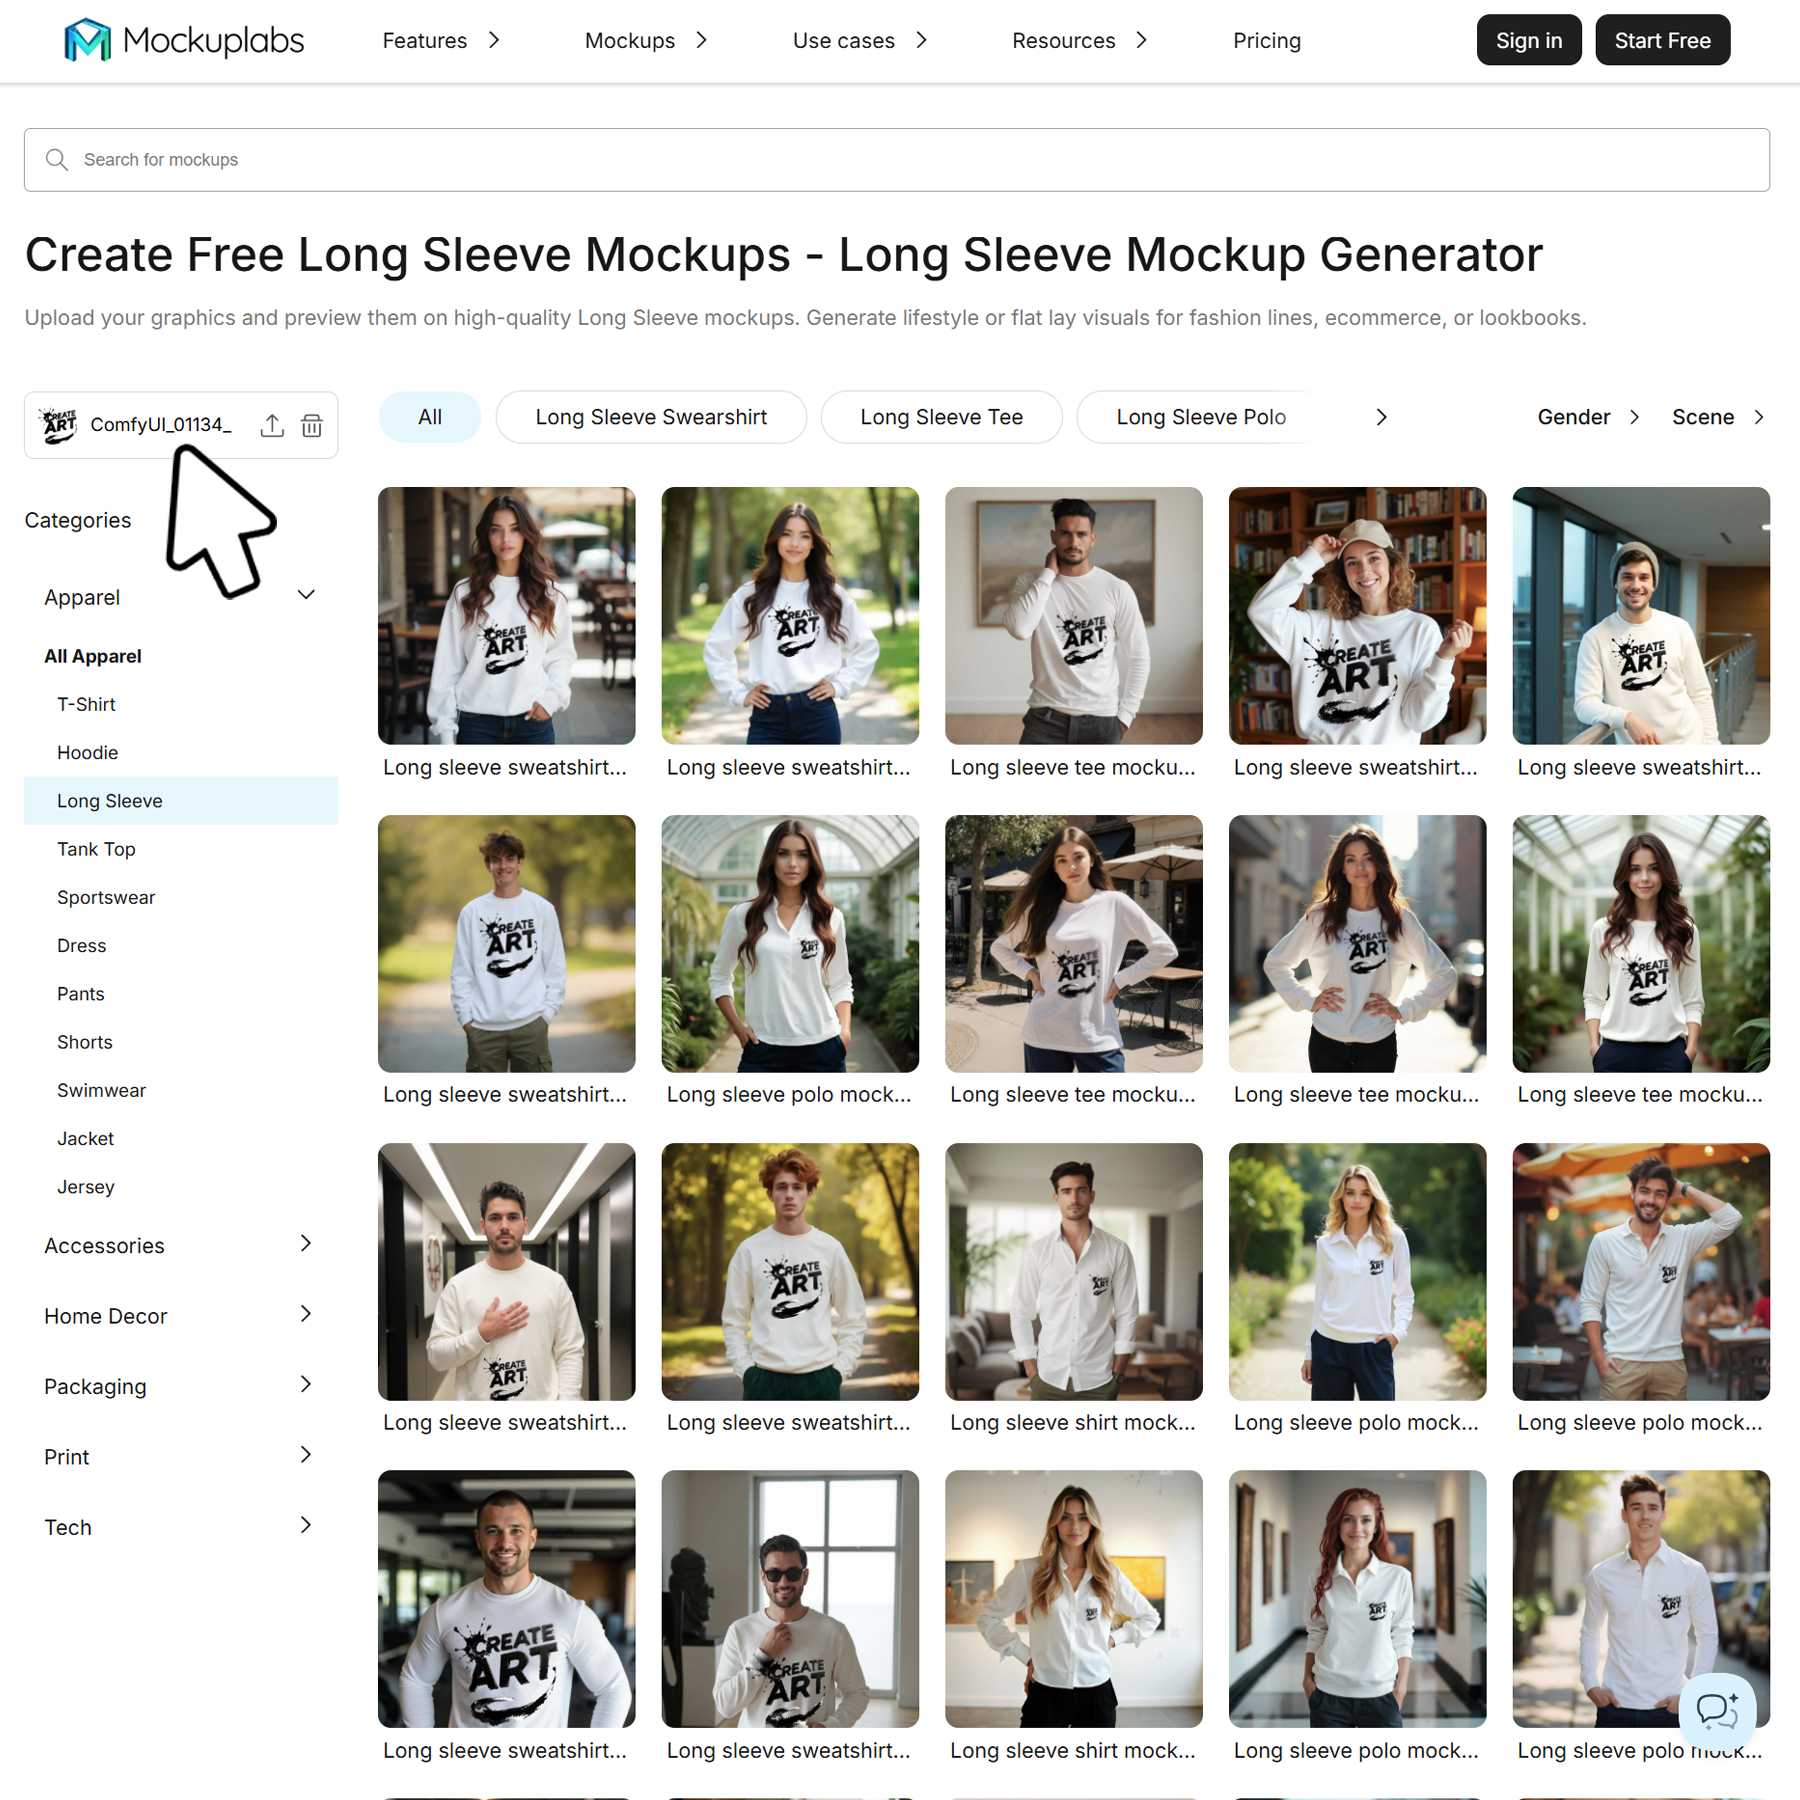
2. Perfect for clothing & apparel
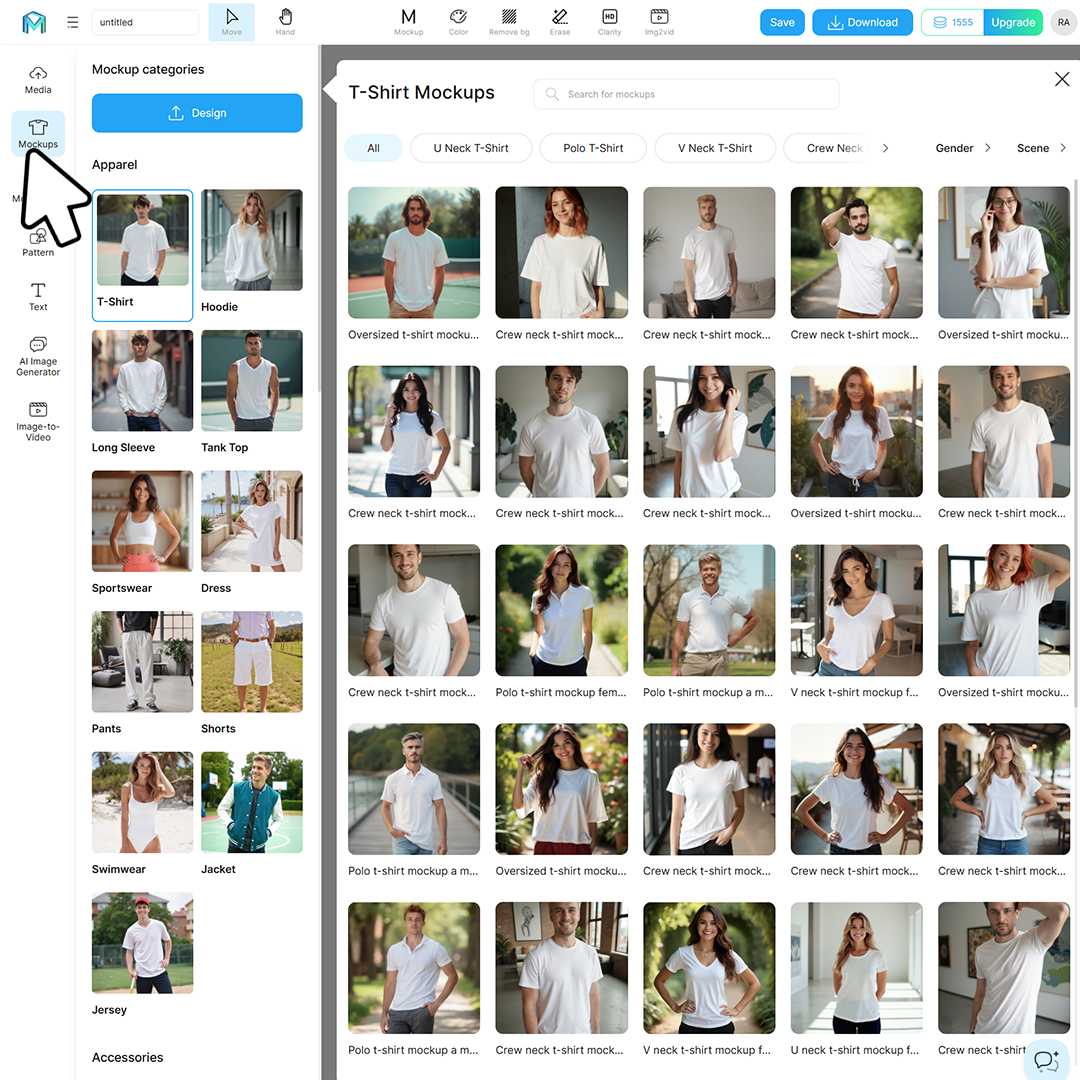
From T-shirts, hoodies, and long sleeves to dresses, sportswear, and hats, Mockuplabs supports a wide range of apparel templates. The mockups show realistic folds, shadows, and textures, making every design look professional.
3. Free, high-resolution downloads
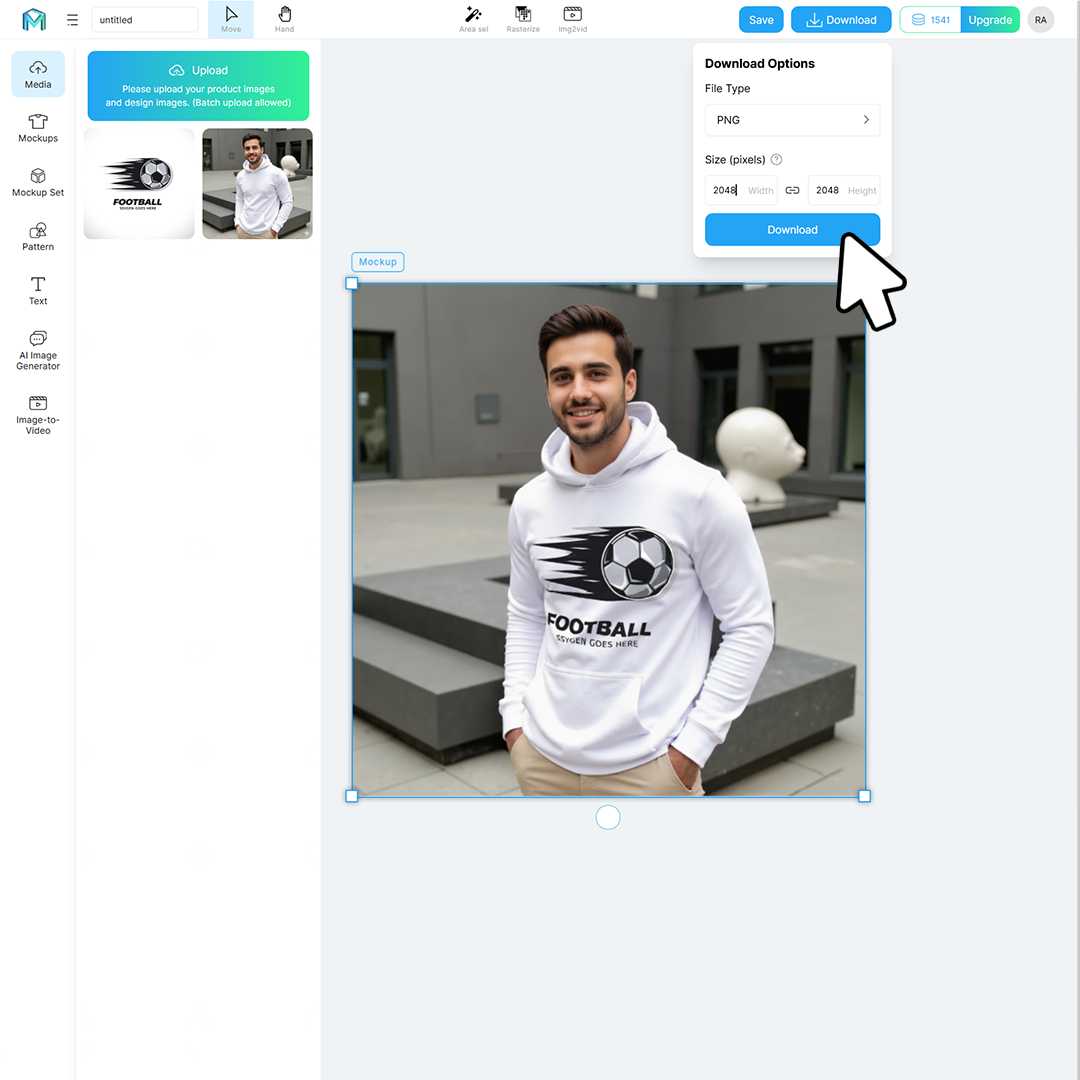
Download your mockups in 2048x2048 high resolution for free. These images are ready for Etsy, Shopify, Amazon, or social media listings, and they don't require any extra editing.
4. Real-time preview
See your designs applied instantly with live preview. Change colors, swap designs, or try different templates without waiting for renders, and this is especially useful for testing multiple variations quickly.
A real-life example: how a small POD brand boosted sales with mockups
Meet Emily, a small business owner who runs a print-on-demand T-shirt shop on Etsy. At first, she relied on flat product photos and simple mockups downloaded from free websites. While these worked, they lacked realism, because customers couldn’t visualize how the shirts would look when worn.
After learning to create custom mockups in Photoshop, Emily began showcasing her designs on high-quality templates with accurate shadows, folds, and fabric textures. She also added color variations without the cost of additional photoshoots. Within three months, her store’s click-through rate increased by 35%, and her conversion rate jumped by 20%.
However, as her product range expanded, manually editing mockups for each design became time-consuming. That’s when Emily tried Mockuplabs. By uploading her base images and generating realistic previews instantly, she cut her mockup creation time by 70%. This allowed her to focus on marketing and customer engagement, helping her store grow into a full-time business.
Conclusion
Creating clothing mockups in Photoshop is a tried-and-true method for bringing your designs to life. It gives you control over every detail, but it can also be slow and technical, especially for sellers who need dozens of product visuals.
That’s why many modern sellers are turning to Mockuplabs — an AI-powered mockup generator that’s fast, simple, and made for real-world e-commerce needs. Whether you’re selling t-shirts, hoodies, or bags, Mockuplabs helps you create stunning product visuals in minutes!
Ready to skip the Photoshop hassle? Start with Mockuplabs for free and design smarter.