How to Make Tumbler Mockups in Canva: Step-by-Step Guide
High-converting tumbler listings require more than just a logo slapped on a white background. While many sellers struggle with rigid mockup templates or expensive photography, the top 1% are shifting to a faster, more realistic approach.
In this guide, we’ll quickly cover the traditional Canva workflow—and then reveal why AI-powered 'Any Image Mockup' technology is the real game-changer. Learn how to transform photos of your actual inventory into professional, 360° realistic mockups that capture every curve and reflection, instantly.
Table of Contents
- Why Tumbler Mockups Matter More Than You Think
- How to Make Tumbler Mockups in Canva: Step-by-Step Guide
- The Canva Mockup Limitations Sellers Face
- Introducing Mockuplabs: The Modern Alternative
- Step-by-Step Workflow: Making Tumbler Mockups in Mockuplabs.ai
- Design Best Practices for Professional Tumbler Mockups
- Conclusion: Stop Designing, Start Selling
- FAQs: Common Tumbler Mockup Questions
Why Tumbler Mockups Matter More Than You Think
Product mockups aren't vanity—they're a conversion lever. Research shows that product images are the second-most important factor in e-commerce purchasing decisions (after price). For tumblers, this is especially critical because:
- Curved surfaces hide design imperfections. Buyers need to see how pattern wraps around the tumbler, including seams and distortion.
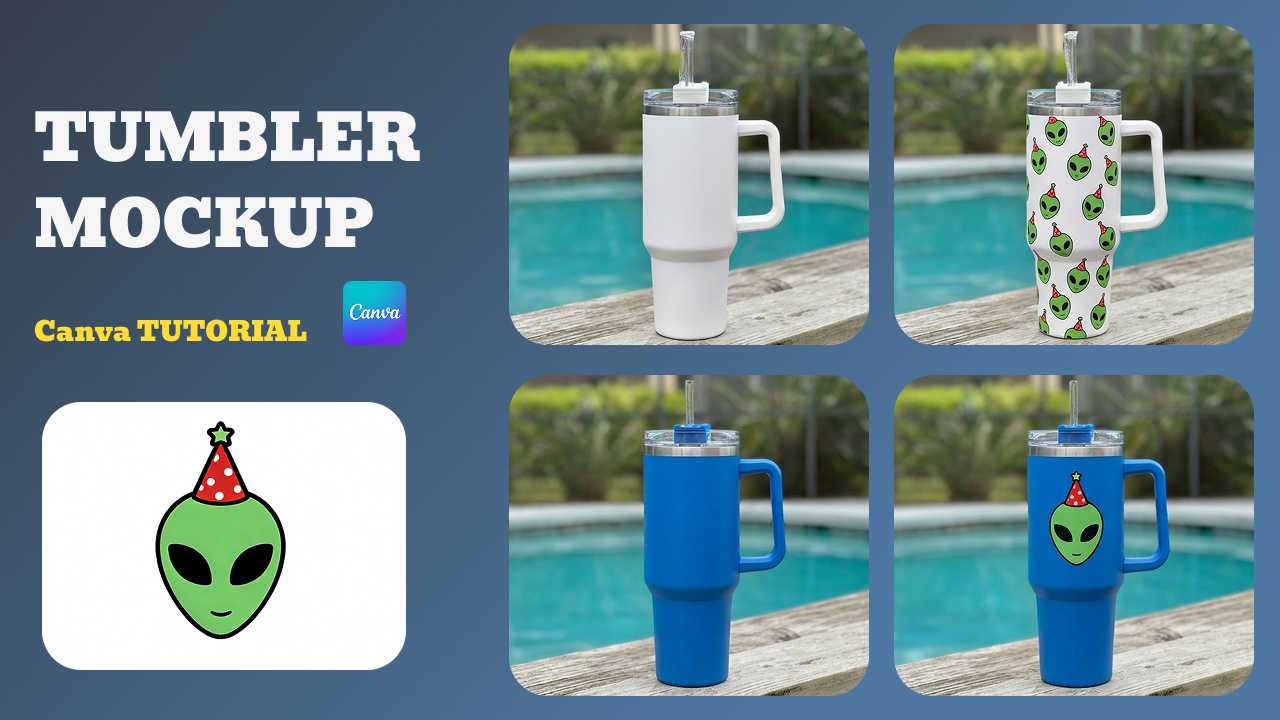
- Color accuracy determines viability. A design that looks great on white might clash on a dark-colored tumbler. Professional sellers test at least 3-5 color variations before launch.
- Personalization requires multiple mockups. Each name variation, text option, or photo placement demands its own mockup.
- Platform requirements differ. Amazon requires 1000x1000px minimum, Etsy prefers lifestyle context, and social media demands vertical formats.
Without realistic mockups, you risk creating products that look terrible in production, triggering returns, negative reviews, and algorithmic penalties.
How to Make Tumbler Mockups in Canva: Step-by-Step Guide
Step 1: Set Up Your Custom Canva Template
- Open Canva and select Custom Size.
- Enter dimensions: 11 inches × 8.5 inches (standard tumbler wrap).
- The blank canvas appears. This represents the flat template that will wrap around the cylindrical tumbler.
Step 2: Upload or Source Your Base Tumbler Image
Upload a transparent PNG of your base tumbler. You often have to duplicate and flip the image to create a "front-and-back" view, adjusting opacity to 50-70% just to visualize where the design might land.
Step 3: Use the Selection Tool (The Time-Consuming Part)
This is the most tedious phase. You must manually trace every edge, curve, and seam using selection tools. This precision work alone can eat up 15–30 minutes just to create a usable clipping mask.
Step 4: Create a Smart Object for Your Design
Since Canva lacks advanced distortion controls, you must manually Warp your artwork (Ctrl+T) to mimic the tumbler’s curves. This is often imprecise, leading to designs that look "flat" rather than wrapped around a cylinder.
Step 5: Apply Lighting and Shadow Effects
Professional mockups require shadow mapping—the darkening where the tumbler folds or the lighting catches edges.
- Duplicate your design layer three times (for shadow, midtone, and highlight layers).
- On the shadow layer: Blend Mode = Linear Burn, adjust opacity to 30-40%.
- On the midtone layer: Keep as normal, opacity 100%.
- On the light layer: Blend Mode = Linear Dodge (Add), adjust opacity to 20-30%.
- This creates the illusion of realistic fabric depth.
Honest assessment: This is where Canva falls short. The built-in blend modes are limited, and manual adjustment takes trial-and-error. Professional designers often export to Photoshop at this stage.
Step 6: Download and Prepare for Listings
Finally, you export at 3000px as a PNG or JPG, and rename with your SKU or design ID.
Pro tip: Want to see this workflow in action? This detailed video from Main Road Digital Creations covers How to Create Tumbler Mockups in Canva.
The Canva Mockup Limitations Sellers Face
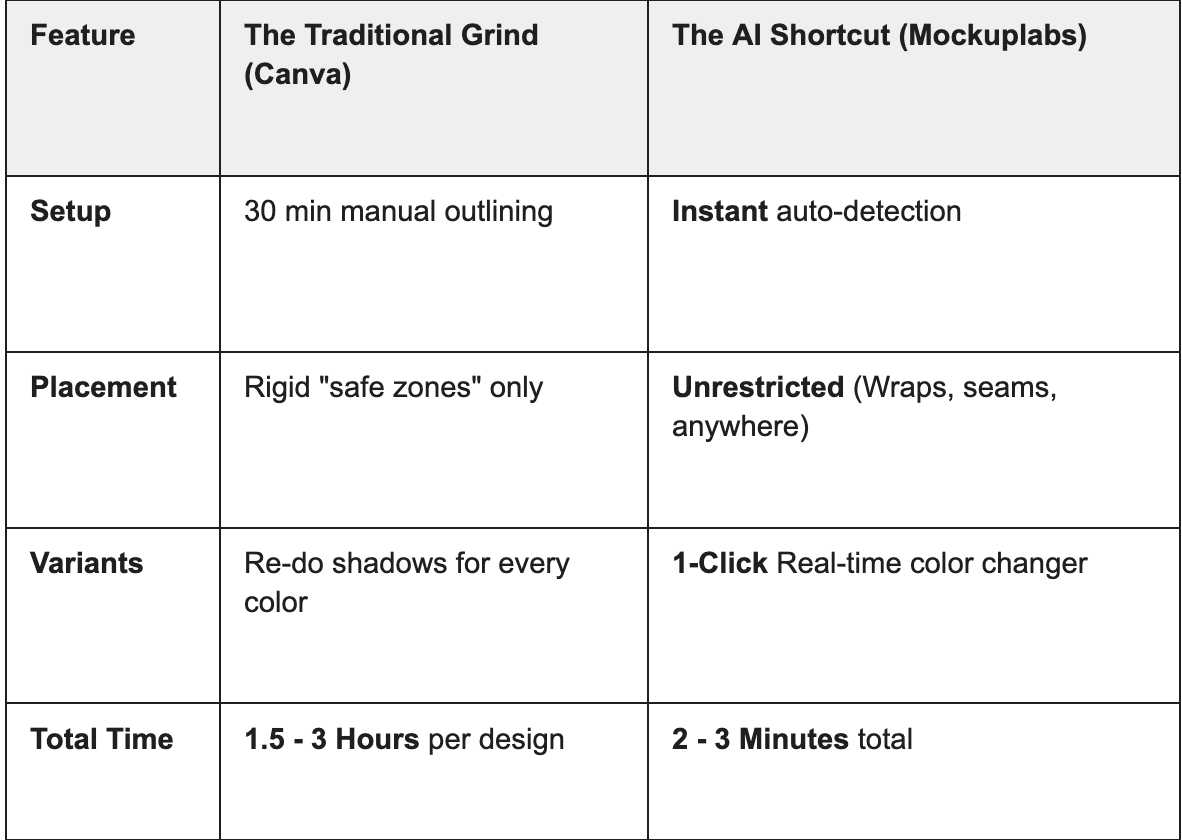
While Canva is a great entry-level tool, high-volume sellers eventually hit a "productivity ceiling." Here is why manual templates are holding your brand back:
1. Zero Creative Freedom (Static Zones)
Canva templates lock you into predetermined "safe zones". If you want to experiment with full-wrap prints or unconventional side-seam placements, these rigid templates simply won't allow it.
2. The "Color Variant" Nightmare
Need your design in Black, Navy, and Rose Gold? In Canva, you must duplicate files and manually re-adjust lighting and shadows for every single color. This multiplies your workload by the number of SKUs you offer.
3. Hidden "Free" Costs
Professional, watermark-free exports require a Canva Pro subscription ($180/year). For a seller creating dozens of mockups monthly, this is a recurring tax on your profit margins.
4. Brand Inconsistency
Because lighting and shadows are adjusted manually, every mockup in your gallery looks slightly different. This disjointed appearance subtly reduces buyer trust and makes your store look less professional.
Introducing Mockuplabs: The Modern Alternative
1. True "Any Image" Mockup Generation
Upload a photo of your actual tumbler—or any blank product—and our model instantly maps the 3D curves. No manual selection tools or shadow mapping guesswork. You get realistic lighting and fabric folds applied automatically to your specific product.
2. Proprietary Real-Time Color Changer
Launching a 5-color SKU set? Upload your photo once. Our color changer lets you swap hues and saturation in real-time with pixel-perfect previews. No re-uploads, no re-editing shadows—just instant variants.
3. Precision Control with "Area Selection"
If the AI-generated light doesn't match your vision, use the "Area Selection" tool. Simply "paint" where your design should appear, and Mockuplabs intelligently adjusts the lighting for those specific zones. You get the precision of Photoshop without the manual drudgery.
4. Full-Wrap Freedom
Stop being restricted by template "zones". Place your design on the front, back, side seam, or as a seamless full wrap. This creative freedom is essential for sellers building a premium, differentiated brand.
5. All-in-One Content Studio (AI Video & Images)
Beyond mockups, access a suite of AI generators (Nano Banana, Qwen) and image-to-video models (Kling, Runway). Transform your static mockups into viral TikToks or Instagram Reels in a single platform.
Step-by-Step Workflow: Making Tumbler Mockups in Mockuplabs.ai
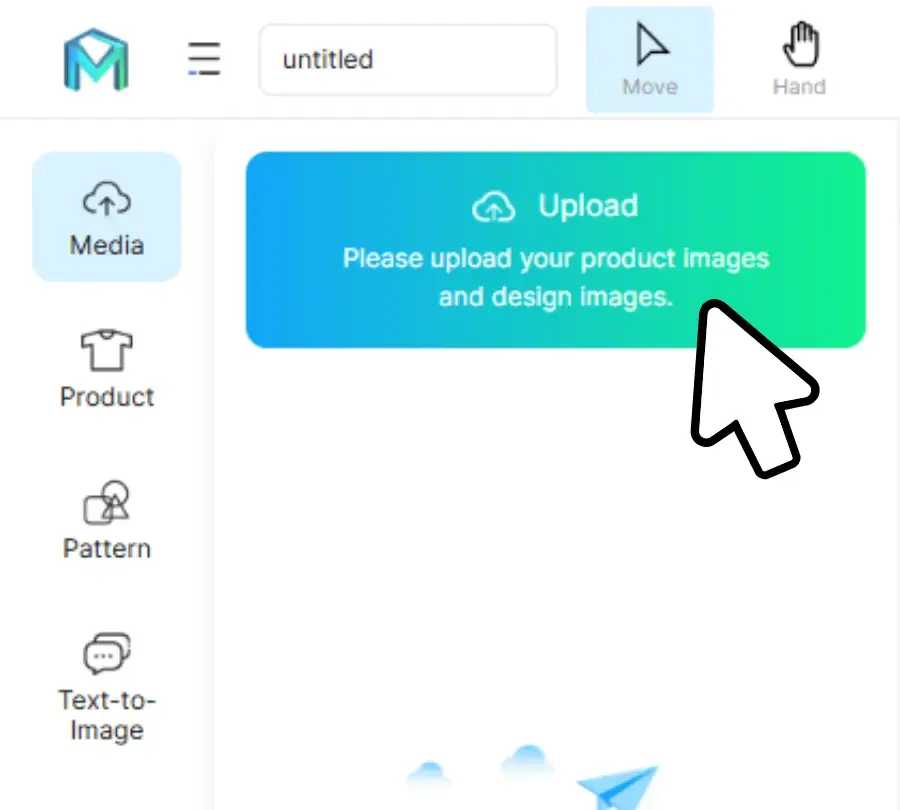
Step 1: Upload & Auto-Detect
Click Upload and drop in any photo—your own product shot, a blank tumbler, or even a reference image. No pre-processing required.
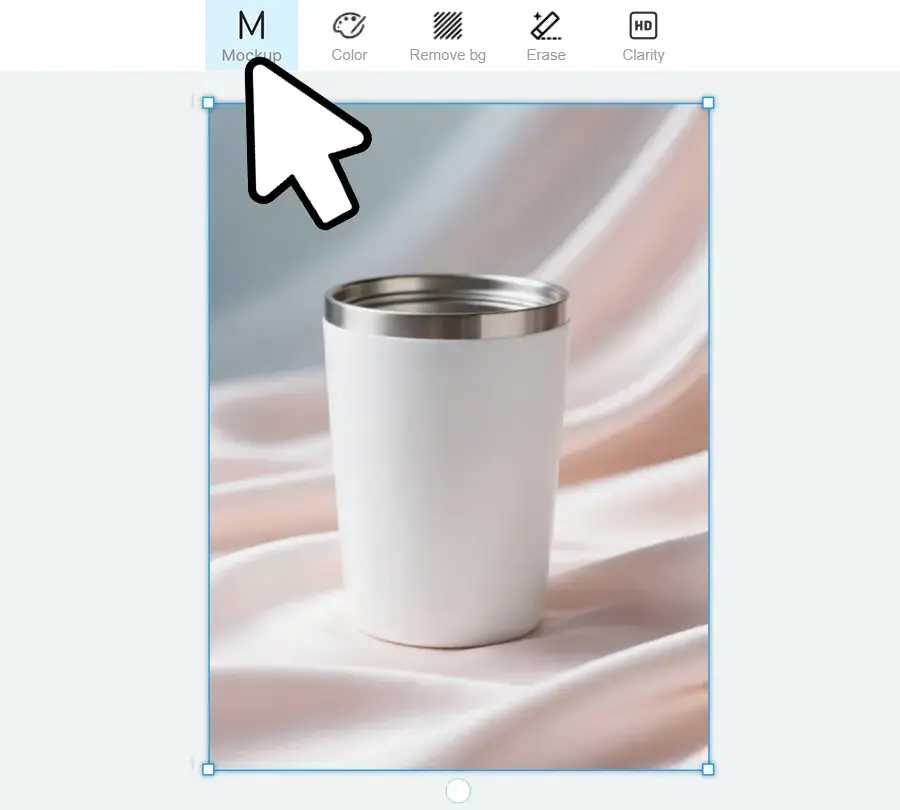
Step 2: Instant "Mockup" Conversion
Select your image and hit the Mockup button. In 5-8 seconds, our model analyzes the object’s geometry, applying intelligent lighting and fabric/surface simulation automatically.
Step 3: Drag-and-Drop Design
Drop your PNG artwork onto the canvas. Watch it instantly conform to the curves, folds, and reflections of the tumbler. Scale and rotate with real-time feedback.
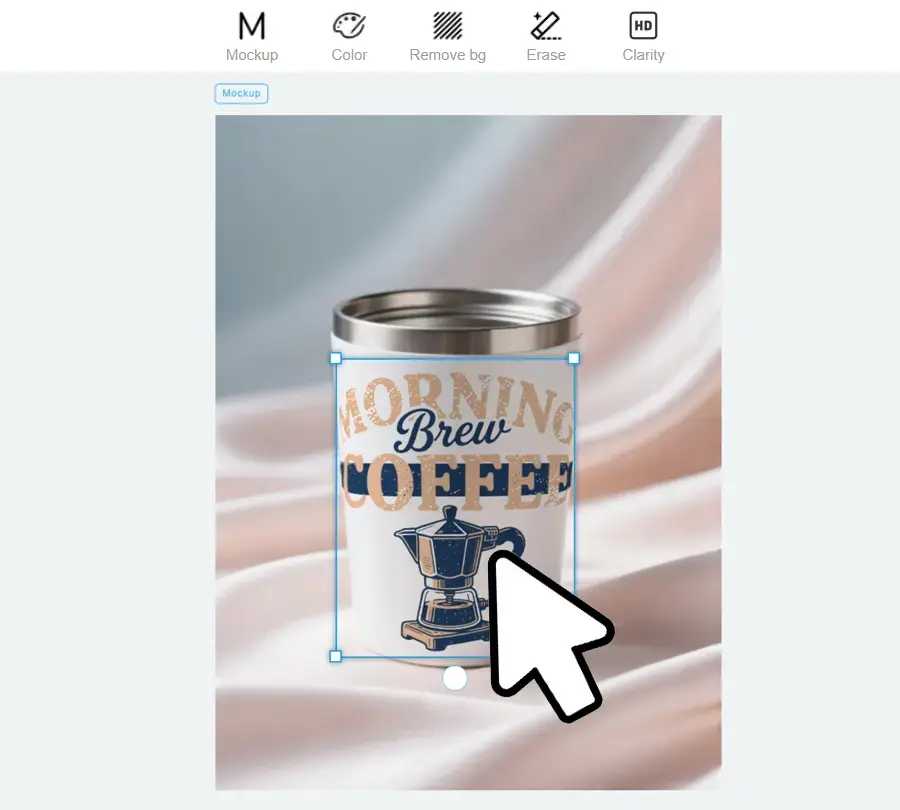
Step 4: Precision "Area Selection" (Optional)
Need the design only on a specific part? Use Area Selection to click-to-fill segments or the Daub tool to paint precise regions. The AI intelligently adjusts shadows to match your custom zones.
Step 5: Real-Time Color Variants
Open the Color Changer to swap hex codes or pick hues. Unlike static templates, our engine updates the highlights and shadows in real-time. Generate an entire 5-color SKU set in under 60 seconds.
Step 6: Pro-Grade Export
Download watermark-free assets in PNG, JPG. Choose resolutions up to 4K for crystal-clear Amazon or Etsy listings that stand out from the competition.
🚀 The Result: Massive Efficiency Gains
- Single Mockup: 2 Minutes (vs. 2 Hours in Canva)
- 5-Color Collection: 10 Minutes (vs. a whole work day)
Design Best Practices for Professional Tumbler Mockups
Regardless of the tool you use, follow these industry standards to ensure your mockups translate into real-world sales:
- Design for the Wrap, Not the Flat A 2D rectangle looks different when curved. Use a width of 7.5–8 inches (standard circumference) and ensure seamless alignment where the edges meet.
- The "Seam Safety" Zone Keep critical text and logos at least 0.5 inches away from the vertical seam. Shadows and distortion are highest here, which can make your branding unreadable.
- The 3-Tone Contrast Test Never launches based on one preview. Always test your design against Light, Medium, and Dark tumbler colors. This ensures your graphics "pop" across your entire SKU range.
- Stick to 300 DPI For photo-based designs or detailed patterns, 300 DPI is non-negotiable. Low-resolution source files will pixelate on larger 30oz or 40oz tumblers, leading to customer returns.
- Respect the "Curvature Distortion" Graphics placed near the top rim or bottom base will distort more due to the tumbler’s perspective. For maximum legibility, keep your core message centered vertically.
- Maintain Lighting Consistency If you mix mockups with real lifestyle photos (e.g., a hand holding the cup), ensure the light source comes from the same direction. Inconsistent lighting breaks the "illusion" of quality and reduces buyer trust.
Conclusion: Stop Designing, Start Selling
Do you want to spend hours fighting with manual layers in Canva, or minutes launching a professional 2026 collection? By switching to Mockuplabs, you're not just buying a tool—you’re buying back your time. Stop guessing how your designs will wrap and start showing your customers the photorealistic quality they deserve.
Ready to see the difference?
Transform your own product photos into high-converting assets in under 2 minutes.
FAQs: Common Tumbler Mockup Questions
Q: Do I need Photoshop to make professional tumbler mockups?
No longer. While Photoshop remains the industry standard for advanced editing, AI mockup generators like Mockuplabs have eliminated the need for most sellers. If you don't have Photoshop skills and don't want to learn, MockupLabs is significantly easier and faster.
Q: Can I create video mockups (animated tumblers)?
Yes, with Mockuplabs. The platform integrates AI video models (Kling, Runway, Hailuo, Seedance, Wan). You can transform a mockup into a short video showing the tumbler rotating, being held, or placed in a lifestyle scene. This is excellent for TikTok, Instagram Reels, and Pinterest ads.
Q: How do I export a Mockuplabs mockup without a watermark?
All Mockuplabs.ai exports are watermark-free by default, regardless of your plan. Simply click Download, select your format (PNG, JPG, WEBP), choose resolution, and download. No additional steps needed.
Q: What size should my mockup be for different platforms?
- Amazon: 1000×1000px minimum; 2500×2500px recommended.
- Etsy: 800×800px minimum; 1000×1000px ideal.
- Social media (Instagram, Facebook): 1080×1080px (square), 1200×630px (landscape).
- TikTok: 1080×1920px (vertical).
Most tools, including Mockuplabs, allow you to export at multiple resolutions in one click.
Q: How do I add text to a tumbler mockup?
In Canva: Import text as a separate layer, position it manually, and apply the same shadow/lighting effects.
In Mockuplabs: Add text within the platform (or import as part of your design image), then drag and position it on the mockup. Tool automatically adjusts text perspective and lighting.