2026 Ultimate Guide: How to Design & Visualize All-Over-Print Shirts
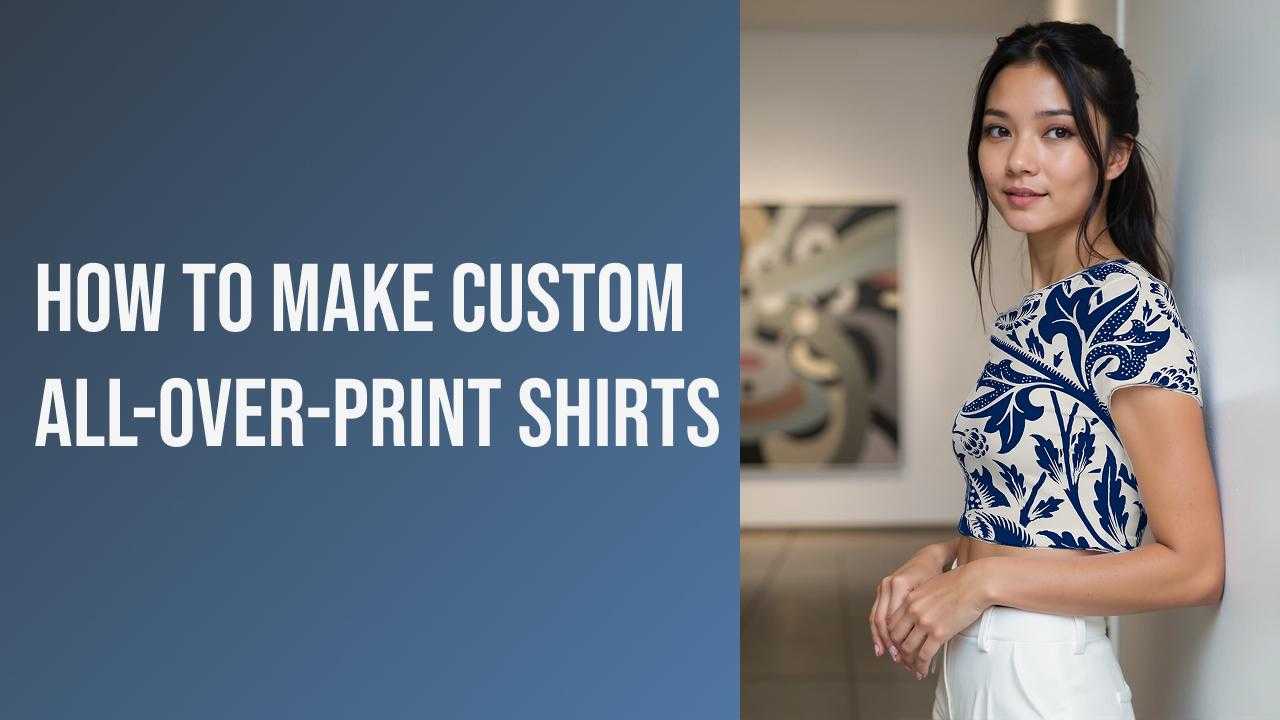
Designing a head-turning all-over-print (AOP) shirt used to require expensive 3D software or expert Photoshop skills to align patterns across seams. Today, creating high-impact custom apparel is accessible to everyone. With the All-Over-Print feature from Mockuplabs.ai, designers and print-on-demand (POD) entrepreneurs can transform flat patterns into realistic, full-coverage product previews in mere seconds.
Table of Contents
- What Is an All-Over-Print Shirt?
- Why Choose All-Over-Print Designs?
- How to Make Custom All-Over-Print Shirts
- Design Tips for High-Quality AOP Shirts
- Conclusion
What Is an All-Over-Print Shirt?
An all-over-print (AOP) shirt features artwork that covers the entirety of the fabric, extending from the collar to the hem and across the sleeves, rather than being confined to a central rectangle like a standard graphic tee. This printing technique, often achieved through sublimation or large-format digital printing, allows for continuous patterns, bold gradients, and immersive visuals that wrap seamlessly around the garment.
 Using Mockuplabs.ai, you can replicate this effect digitally with stunning accuracy. The platform’s AI interprets the 3D geometry of the shirt, ensuring that your design flows naturally over folds, ripples, and body contours, providing a true-to-life representation of the final physical product.
Source: Mockuplabs
Tip: Before diving into complex AOP designs, it is crucial to understand the basics of digital visualization. If you are new to this technology, start by learning what is a mockup and how it bridges the gap between a digital file and a physical product.
Why Choose All-Over-Print Designs?
In the competitive world of e-commerce and fashion, standing out is essential. All-over-print designs offer several strategic advantages over traditional placement prints:
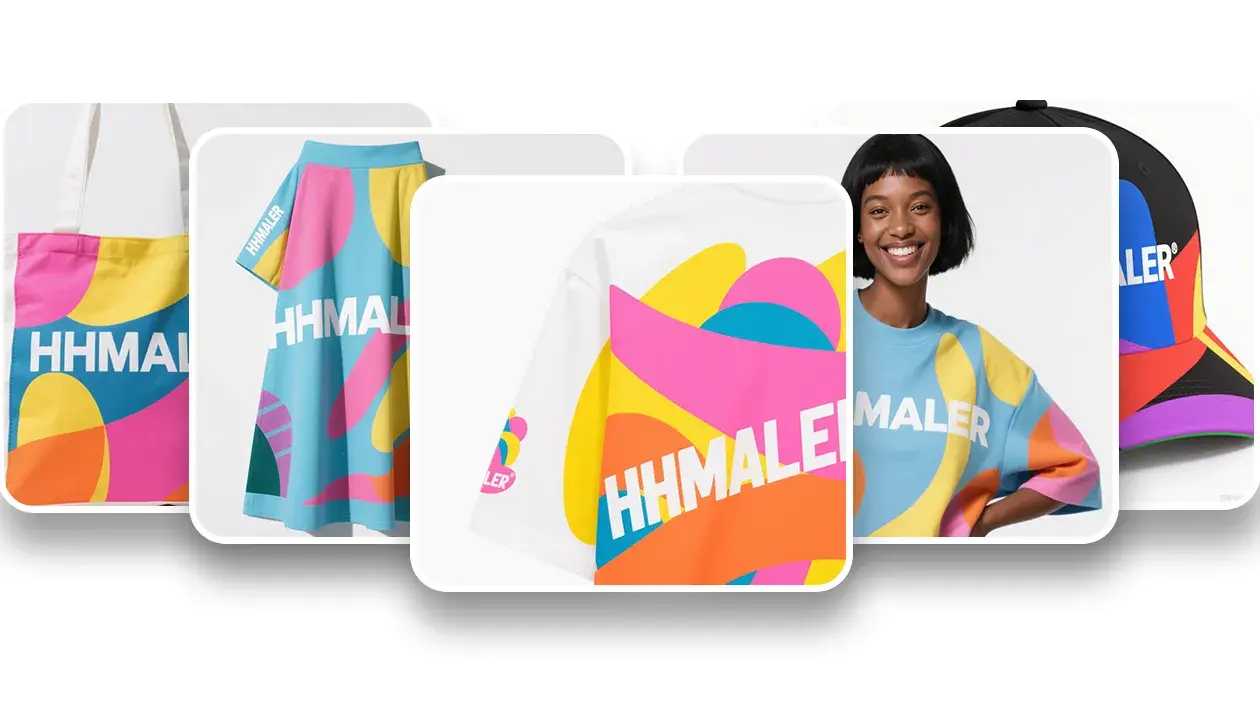
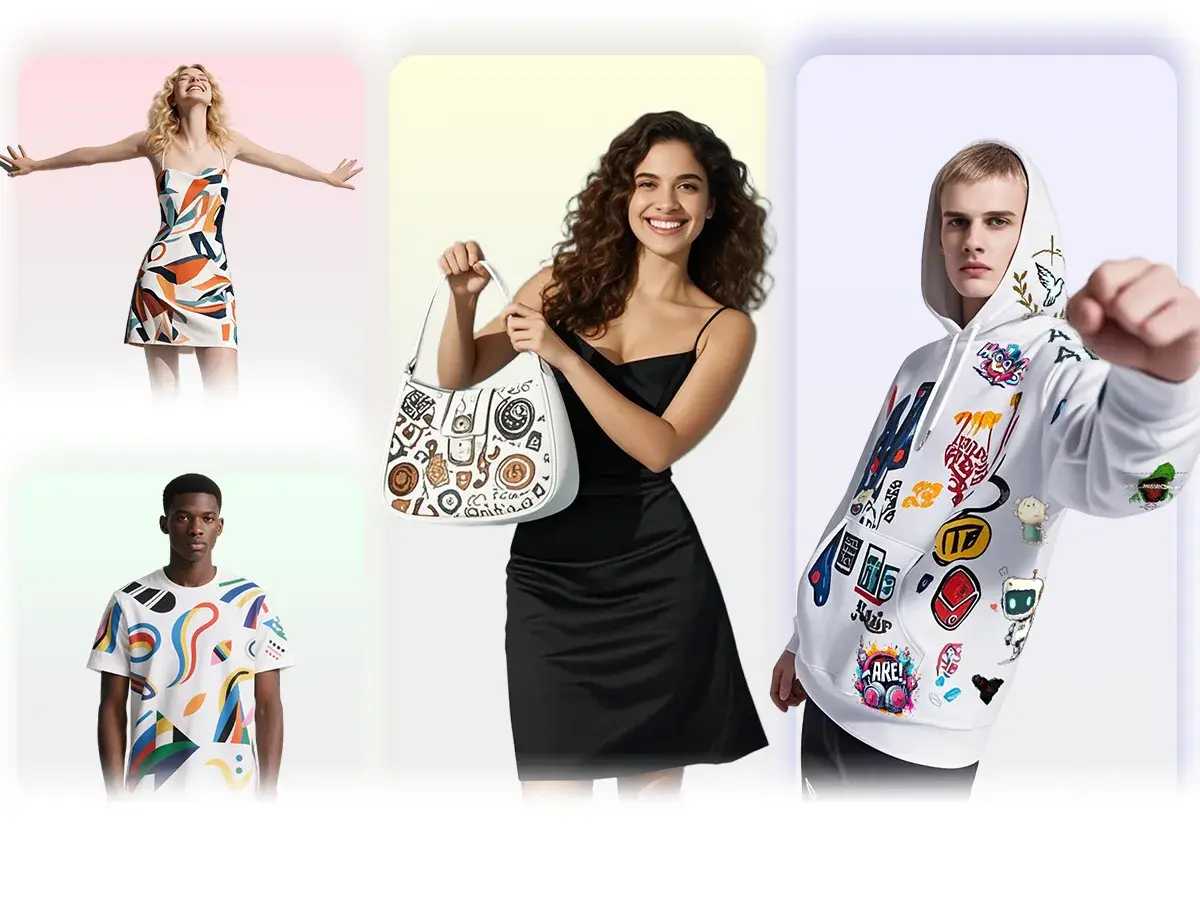
- Maximum Visual Impact: AOP garments command attention. The ability to utilize the entire canvas of the shirt allows for more creative freedom and intricate storytelling.
- Higher Perceived Value: Full-coverage prints are often associated with premium streetwear and boutique fashion, allowing sellers to command higher price points.
- Differentiation: While many POD stores sell standard logo tees, offering AOP items differentiates your catalog.
By using a high-quality AOP mockup generator to visualize these complex products, you ensure that your marketing materials match the premium quality of the garments you are selling.
How to Make Custom All-Over-Print Shirts Online
Creating a professional AOP mockup is no longer a technical hurdle. Mockuplabs streamlines the workflow into four intuitive steps, automating the complex warping and lighting adjustments for you. If you are familiar with the basics of how to make clothing mockups, the AOP process will feel like a natural, powerful upgrade.
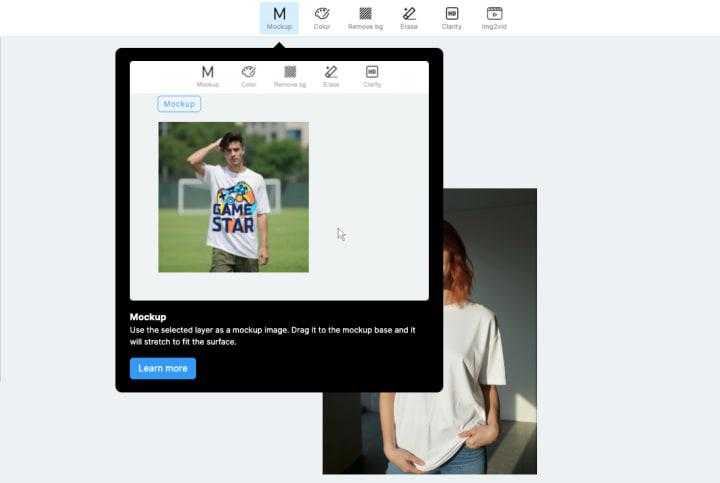
Step 1: Upload and Convert Your Product Image
The process begins by getting your base image ready. Navigate to the AOP feature and upload a high-resolution photo of the plain shirt you intend to use (JPG or PNG). If you don't have your own photography, you can browse the free T-shirt templates to find an image.
Once uploaded, click “Mockup.” The AI engine instantly analyzes the image, separating the garment from the background and mapping its structure. This conversion prepares the file for intelligent warping, ensuring that any pattern you apply later will bend and fold realistically with the fabric.
Tip: If you are using specific suppliers, you might want to review how to create mockups with Printify to ensure your base image matches your fulfillment partner’s stock.
Step 2: Apply Your Design and Adjust
This is where your vision comes to life. Drag and drop your pattern file, artwork, or logo onto the selected area. The mockup generator engine will automatically wrap the image around the shirt’s curves.
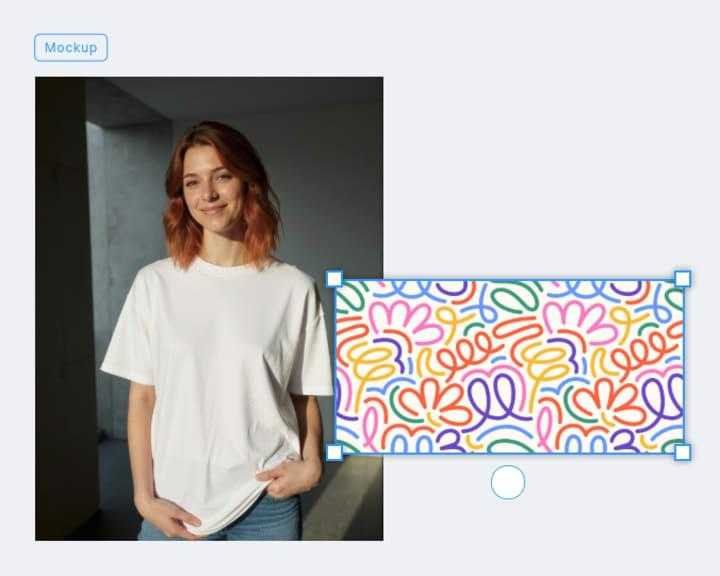
You can then fine-tune the appearance:
- Scale: Zoom in for a bold, abstract look or zoom out to repeat a pattern.
- Rotate: Angle your design to flow dynamically across the shirt.
- Tile: If you are using a seamless pattern, enable tiling to cover the whole area without stretching.
The real-time rendering shows exactly how the light and shadow interact with your graphic, maintaining the texture of the fabric underneath.
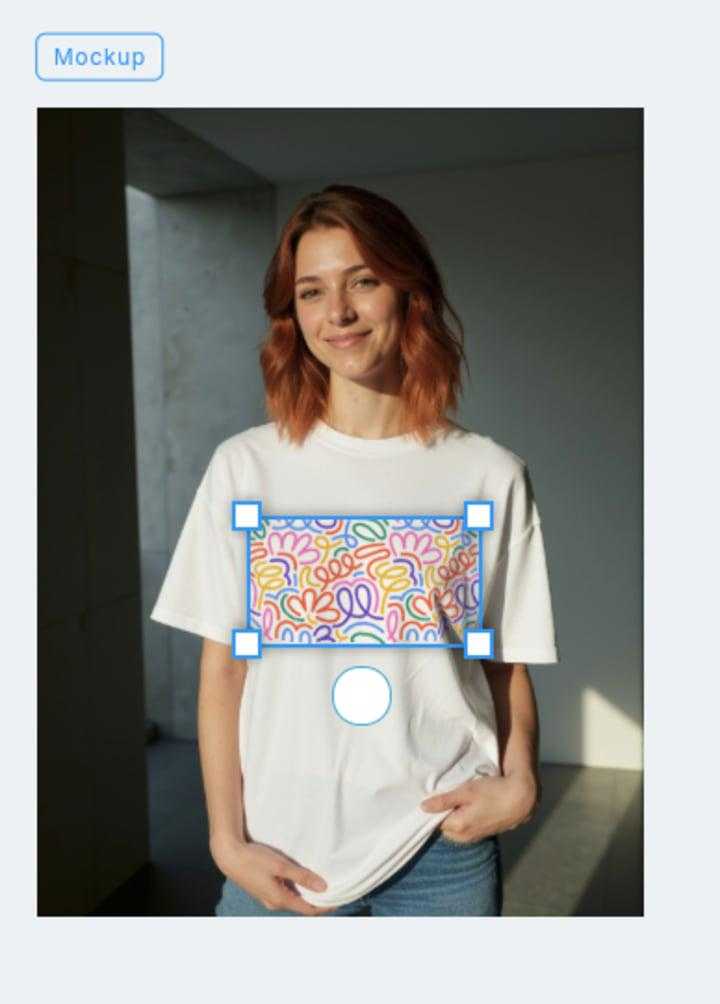
Step 3: Select Pattern Types with 1 Click
Unlike standard prints that sit on the chest, AOP requires a different printing method and pattern mapping. Click on the “Pattern Type” to select the correct method for your custom shirt.
Mockuplabs' auto-segmentation will outline the main body, sleeves, and collar. If the automatic selection misses a spot, use the manual selection, brush or daub tools to refine the mask, ensuring that elements like buttons or neck labels remain unprinted if desired.
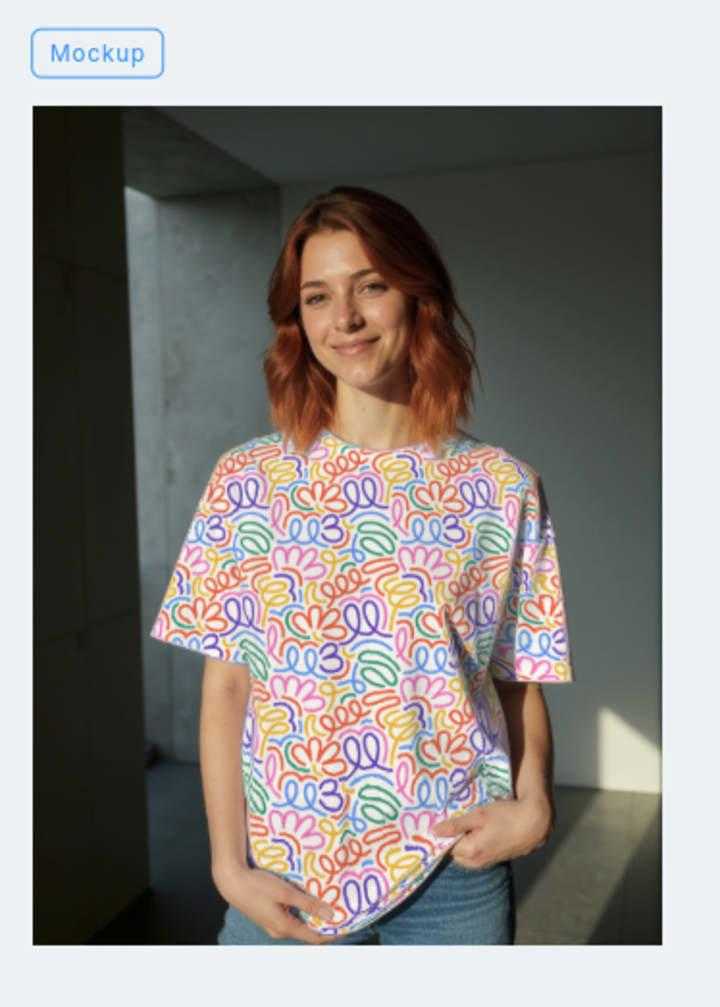
Step 4: Preview and Download in Seconds
Look closely at the seams and folds to ensure the pattern continuity looks natural. Once satisfied with the result, click “Download.” You can export your new AOP mockup in high-definition formats suitable for your online store, social media ads, or client presentations. This speed allows you to test dozens of design variations in the time it would normally take to render one manually.
Pro Tip for 2026: Static images are great, but video converts better. Consider taking your static design and learning how to use an AI video maker for hoodie mockups (the technique applies to AOP shirts too) to create dynamic social media content that stops the scroll.
Design Tips for High-Quality AOP Shirts
To ensure your mockups look as professional as possible, keep these best practices in mind:
- High-Resolution Assets: Always use high-DPI images for your patterns. When stretching art across a full shirt, low-res files can become pixelated and blurry.
- Seamless Patterns: For the best results on the main body, use "seamless" or "repeat" patterns. This prevents visible hard edges where the image restarts.
- Mind the Seams: Remember that in physical production, patterns may not match up perfectly at the side seams. Design with this in mind—abstract or busy patterns often hide seam mismatches better than precise geometric lines.
Conclusion
Custom all-over-print shirts are a fantastic way to elevate your brand and offer unique merchandise that captures customer interest. With Mockuplabs, the barrier to entry for creating professional-grade AOP visuals has been removed.
From the initial upload to the final export, the process is automated, intuitive, and incredibly fast. Start experimenting with your designs today and fill your store with eye-catching apparel that sells itself.